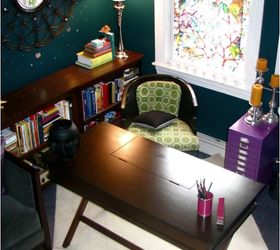
I started with the frame. The seat easily came off by removing a few screws. The back cushion was attached to the frame by a few buttons which were also easily removed. After cleaning it off, I took the frame out to the driveway for a little sanding and a few coats of spray primer. The final coat was a black lacquer spray. Already it was looking like a completely different chair.
Since I was trying to redo the office with a very small budget, I used a fabric that I already owned to recover the cushions. I think it was about $10 a yard.
Using a staple gun and making sure the fabric pattern was lined up and straight, I attached the fabric to the bottom cushion. The back cushion was the most challenging part. I turned two pieces of fabric in on each other and laid them over the cushion. I pinned around the edges to copy the shape of the cushion. There might be an better way to do this but this worked out well for me. I sewed the fabric together and flipped the cover inside out. I slid the cushion inside and sewed the bottom closed by hand.
At first, I was intimidated by the thought of having to make cloth buttons but it was way easier than I thought it would be. I went to my local fabric store and the woman there showed me what is called "half ball button covers". They are basically a front metal piece that you wrap fabric around and secure with a back metal piece. Easy peasy. When I had finished sewing the buttons on, I reassembled the chair.


Original article and pictures take http://www.hometalk.com/14114361/before-after-5-chair-redo-on-a-budget site
No comments:
Post a Comment