Project a retro bathroom vanity into something even Jo Anna Gaines would be proud of! With some elbow grease, creativity, and little time- this project completely transformed a bathroom! **I flip ugly houses and tackle many of the DIY projects myself-- come follow along at my blog, The Bachelorette Pad Flip: https://bachelorettepadflip.wordpress.com/In this house flip, the master bathroom was AWFUL. Like puke green awful. Puke green stained cabinets, puke greenish yellow marble top, puke green toilet, and that wallpaper! Oh my....it was awful! My first step was to remove the hideous marble countertop.
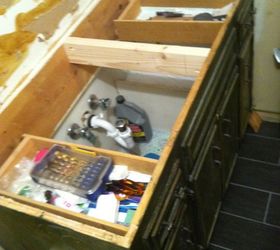 The next step involves cutting plywood. And you might have to call your dad and your uncle to do the cutting if you don't own a saw. Or maybe that's just me.
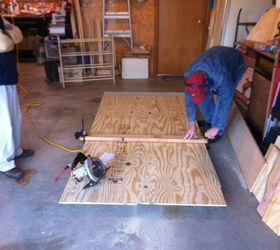 Next, I cut the plywood down to size. I measured how much I wanted it to overhang from the cabinet edge. I used liquid nails to attach it to the cabinet.
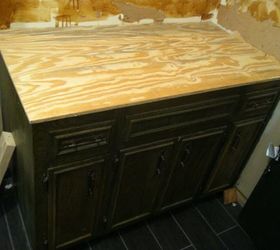 After the plywood, I cut the cement backer board to the plywood. I used the cut plywood as a template and traced around it to get the exact size.
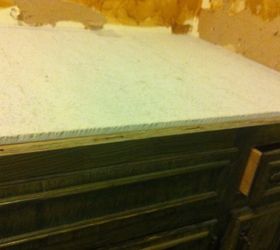 I chose mesh tile squares that measure 12x12. Any type of mesh tile could be used- there are so many textures, colors, and styles that it could dramatically change the appearance. Prior to adhering the tiles, I used a diamond drill bit to drill holes for the faucet and drain. Then I used Mastic to adhere the tile to the backerboard.
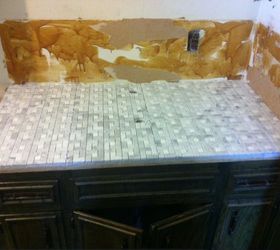 Prior to attaching the sink and faucet, grout the tile after it's dried. I used a vessel sink and faucet. I liked the modern, almost farmhouse style of this vessel sink.
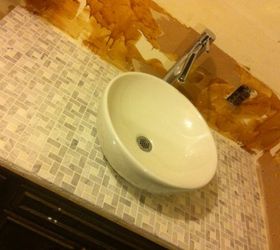 My next step was to paint the cabinets and add new hardware. With the countertop almost done, paint, and new hardware, it was already looking so much better!
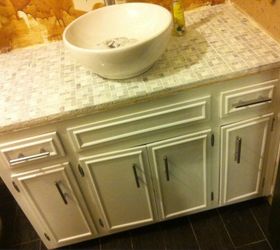 Final touches included adding an enlarged backsplash, trimming the edges, painting the walls, adding a new, & unique mirror. To see a more detailed version of this post, please visit my blog!
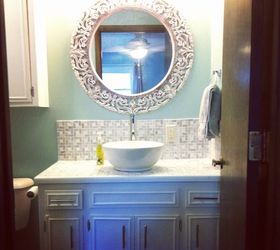
Original article and pictures take http://www.hometalk.com/14127541/fixerupperstyle-diy-bathroom-vanity site
No comments:
Post a Comment